Skip to content

Antenna Journey, Next Chapter

In a previous post, I described how the ATB-75 Tiltover mechanism gave up the ghost in a high wind.  As a result, I’ve been off of HF for about 2 years.

Yesterday I ordered the last Hy-Gain AV-680 that DX Engineering had in stock.  It should be here tomorrow.

The next step is to see if I can find someone local who can fabricate a steel version of theATB_75 for me.

I’m looking forward to having this antenna up. There is now a 6M mountaintop repeater that is active in the area, and also it will allow mw to get on 80M.

Heathkit Clock: My Final Words

It is beautiful. The printed circuit board may be the highest quality I’ve ever seen. It doesn’t keep time any more accurately than any other 60Hz clock.

You would think that they could have incorporated a WWVB receiver as in previous editions. Better yet, a GPS-based timebase. No, it uses the 60Hz line as a timebase.

There are aspects of the assembly that are clunk/finicky too. The predriled holes in the bottom of the wooden sides (used to attached the bottom plate) really need to have a tap run through them. The battery hold-down strap is mickey-mouse. The dots between digits are a kludge.

Antenna Failure!

I looked out the window this morning to see the 10ft mast for my Hy-Gain AV-640 vertical was leaning at about a 15 degree angle. I went outside and saw that the ATB-75 tiltover mechanism had failed in two places:

We’ve been having some high winds lately. It looks like the wind loading on the antenna and mast caused the upper bracket to tear at the bend (left photo). The subsequent movement then caused the upper bolt hole to hog out (right photo)

okay.

I’ve ordered a replacement ATB-75.  I’ve also decided to replace the Hy-Gain AV-640 with a GAP Challenger. My reasons:

  • The AV-640 developed a high SWR on 40 meters. It had done so once before. I did not look forward to disassembling, cleaning, and tightening a bazillion screws.
  • While the SV-640 worked very will sitting on top of a 10ft mast, it was HEAVY.  It took all the strength of my XYL and myself to tilt it down and up.
  • I had a GAP Challenger several years ago. It was easy to assemble and maintain, and worked very well.

The GAP Challenger is now also on the way.  In the meantime, I’ll rely upon my 10-10M end-fed half-wave.

EZ Hang Square Shot Review

The 10-80M End Fed Half Wave antenna arrived. It was time to get it up in the trees in my backyard.  I have a oak tree that is about 30 feet tall, and a 40ft pine tree. At my age there is no way that I’m climbing them.

I looked at several methods of getting the antenna up in the trees.  The coolest was using a drone. At Field Day, a guy had a compressed air cannon that worked really well.I didn’t want to have to learn to fly a drone or construct a cannon. Then I saw the EZ Hang. I admit, I had my doubts – not about the EZ Hang itself, but my ability to use it. They have a new improved model called the EZ Hang Square Shot. I crossed my fingers and ordered it.

It arrived a few days ago. This morning We gave it a shot.  I say ‘we’ because I drafted Sweet Lady Wife as the spotter to see where the yellow weight landed. I carefully read the instructions one more time, put the weight in the slingshot pocket, pulled back, and let fly. son-of-a-gun if the weight didn’t sail over the top of the pine tree and land on the other side!  Sweet Lady Wife saw it hit the ground and directed me to it.

I reeled in the supplied leader line and was set for the next tree.  (Confession: I was so excited about the EZ Hang working on the first try that I immediately shot an email to Denning (Mr. EZ Hang).  Subsequently, the operation on the Oak tree went just as well.

Hopefully, my 10-80M End Fed Half Wave antenna will be on the air tomorrow, thens to the EZ Hang.

Thinking of Adding an End Fed Half Wave

I’m strongly considering adding an 80-10M end fed half wave antenna to my qth.

1, The bands have been DEAD lately. A second antenna wil alow me to verify that the problem is not my AV-640 vertical.

2. I really want to get on 80 Meters.

I’ve ordered the MyAntennas.com EFHW-8010-2K.  My next challenge will be to figure out how to get it up into the trees.

Getting Back in the Saddle

The past year or so has been really hectic.  My professional workload has been much higher than I would like. Things are starting to settle down now. Time to give some attention to my much-neglected ham station.

This morning’s task was to get my weather station connected to the Internet once again.

My weather station is an older Acu-Rite 5-in-1. I was using an old laptop to collect it’s data and send it to Weather Underground.  Several months ago the old PC died but I never got around to doing anything about it.

With a little spare time on my hands, I ordered a replacement laptop from Dell.  This morning I unboxed it, and set it up.  I installed Acu-Rite’s data collection and connectivity software, and within minutes everything was fully operational again.

Click Here to view my Current Weather.

Building the New Heathkit Clock

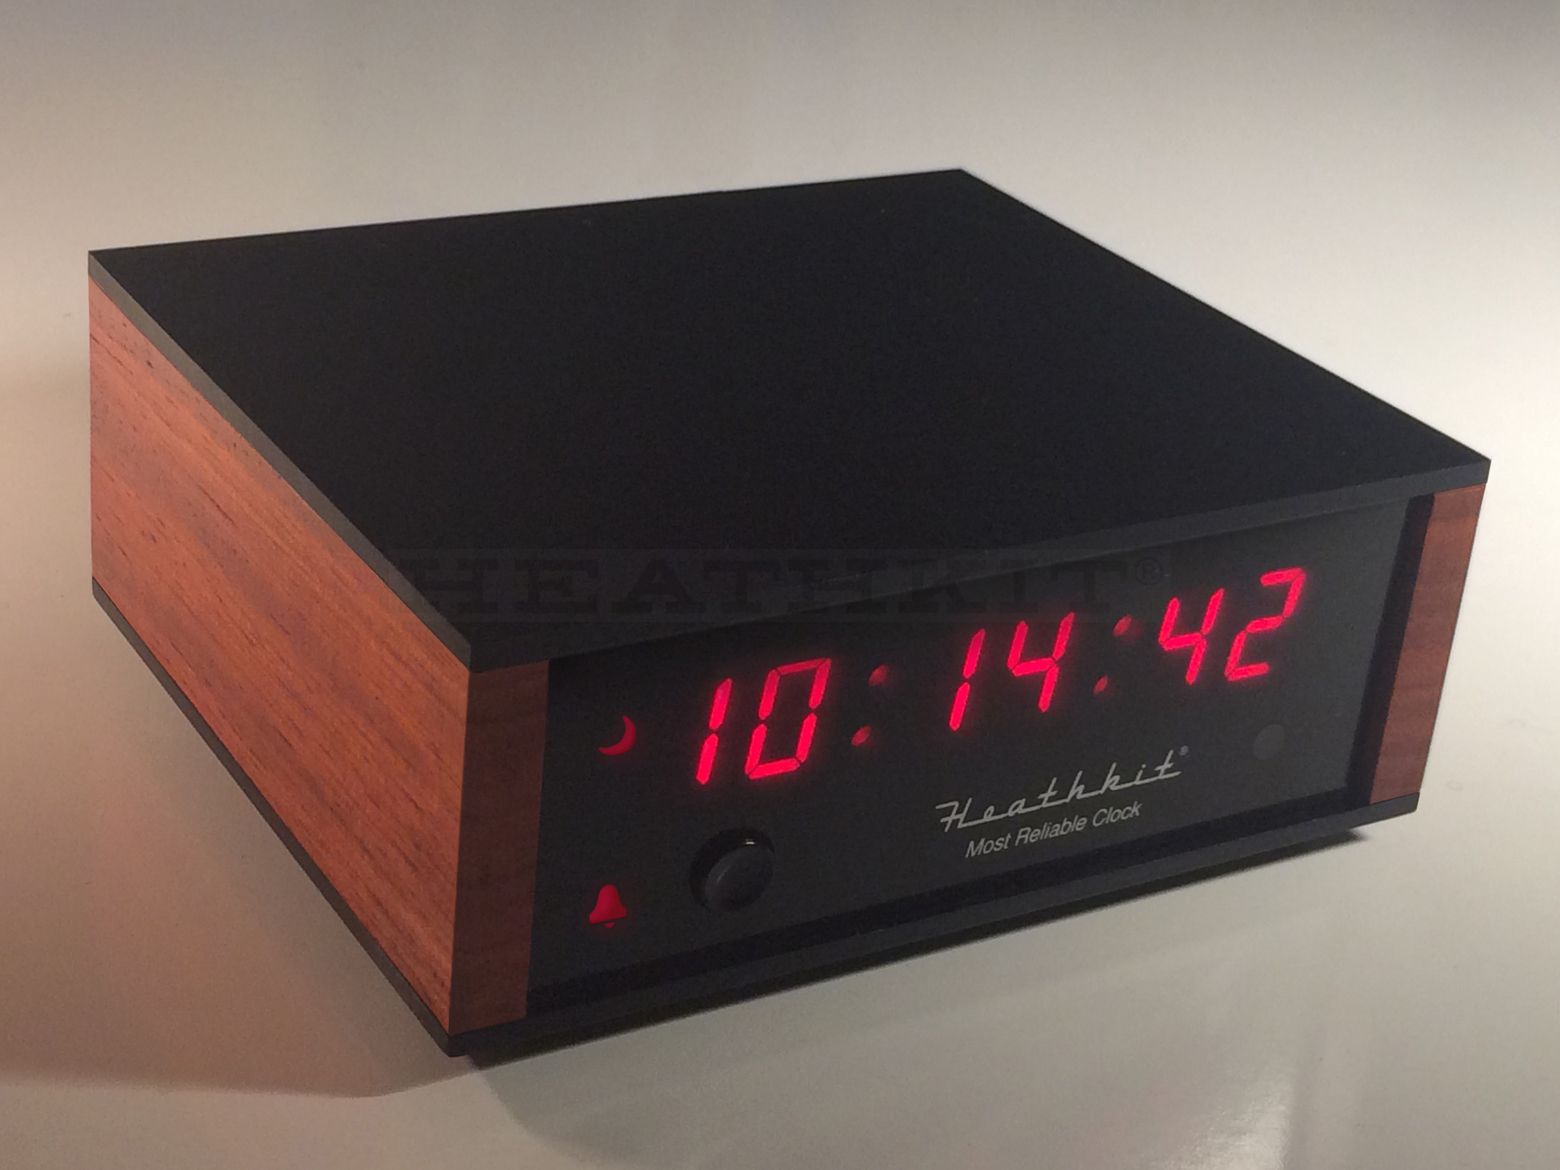
I could stand it no longer – I HAD to build something. I decided it would be Heathkit’s resurrected Most Accurate Clock (GC-1006). Way back when, I lived 1/2 mile from the Phoenix, AZ Heathkit store. I bet I was there once a week. At one time my entire ham station was Heathkit.

A full assembly review will follow, but in this post I want to talk about the tools that make the building not only possible but pleasurable.
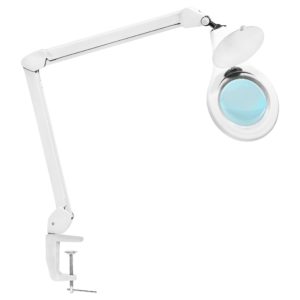
LED Magnifying Lamp

I’m 66 years old now, and my eyes are not what they were when I was nineteen. This thing is nice and bright and the magnifier allows me to give those solder joints a close inspection. I got mine from Amazon.

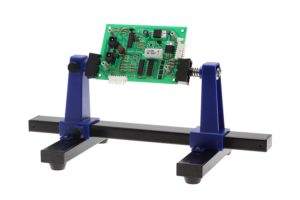
Aven 17010 Adjustable Circuit Board Holder

For $12.27 I was not expecting much, but this quality of this thing surprised me. I wish I had bought this 30 years ago when I was building Heathkits all the time. It holds the pCB nicely, and the PCB can be rotated so you can work on either side. I purchased it from Amazon.

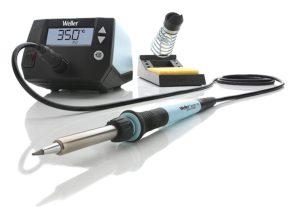
Weller WE1010NA Digital Soldering Station

Nothing symbolized the words “I’m Back” more than this.  Many years and two houses ago (and back when my entire ham station was Heathkit) I owned an older (non-digital) Weller soldering station.  I loved it.  In 2007, I moved into a new house.  It was a very nice house. I had kinda lost interest in Ham Radio and so the fact that there was no room for a ham station didn’t bother.  Nor did the fact that there was an HOA and antenna restrictions. I sold all my ham gear, my test equipment, and my tools. Including that Weller soldering station.

So when I moved into this house out in the country and saw that I would have room for a nice bench along the wall behind me to hold ham gear, and there were no antenna restrictions, I started reacquiring the tools and gear. And one of those tools was this Weller soldering station.

Palomar Engineers PT-340 Tuner Tuner

Long Long ago, there was a company named Palomar Engineers.  Their most famous product , a noise bridge, was inexpensive and had a lot of uses.  Palomar Engineers repackaged a portion of the noise bridge circuitry into a product designed specifically to allow you to tune your antenna tuner without putting a signal on the air.  That product was the PT-340 Tuner Tuner.

I strive to be a polite ham and due as little on-the-air tuning as possible.  A couple of weeks ago this PT-340 popped up in the QTH.com classifieds and I bought it, and I’m really impressed with it.

It certainly lets me tune my antenna tuner off-the-air.  The thing that really impresses me however is that I can tune my Drake MN-2000 Antenna Tuner much faster and more accurately than by conventional means.

With the the radio set to receive on the desired frequency, I turn on the PT-340.  It injects a white noise signal.  Then I tune my MN-2000 tuner to null out the white noise.  That’s it. (Then I turn off the PT-340, of course).

I’m surprised that modern antenna tuners don’t have this function built in.


Back To Top